Wednesday, June 23, 2010

Which brings us to part 2... The matter of hoods.


Now we all know that shooting into harsh light of justabout any type is hardly ever a good idea but, doing landscapes, you want to shoot across the light for that lovely shadow detail. Also, the best results with polarizers are to be had when shooting at square angles to the sun. The problems start when light hits the front element.


Now this is a really exaggerated example, sure, but seeing it displayed this way will hopefully let you think twice about light hitting the front of the lens.

The longer the lens barrel, the smaller the chances of rogue light wreaking havoc with your images but you can never be too careful, can you?


While the good people who design and build our little toys for us do everything in their powers to make the insides of the lens as dull and non-reflective as possible, there could be anything from 5 or 6 to 15 or more pieces of optical glass inside that lens barrel. Every single one of them will reflect some light, refract (or bend) some light and let some light pass through.


The problems occur mostly with the reflected light. That makes things appear that you did not count on...things that look like this...


This is why you need a hood (and lots of time and patience if you want to combine it with a polarizer).

Unless, of course you specifically want those for effect... 


They come in all sorts of shapes and sizes for all lenses but essentially there are petal shaped hoods and cylindrical or conical hoods. You DIY guys out there will find several sites where you can get templates and make your own hoods. Go on then...Google it! Me, I'll buy them, thank you very much... but hey, hats off to the one who wants to do it.

Another alternative will be some of the Hong Kong based sellers on E-bay who do sell them at a fraction of the cost of the "real deal"...oh come on, it is a piece of plastic that should do two things...OK maybe three things...stay in place, stay out of your image and keep light off the front element.

Like so


How worthwhile could it be to pay five to ten times the price for the same plastic, only branded? As long as it works, right? You could also buy Nikon and mostly get the hood included standard with the lens unlike Canon where hoods are only included with the top L glass...Oops, that slipped out.

Oh, and one nice thing is that they can also mount in reverse so they take up no extra space in your kit bag.


Go on then, make one, buy one...but, whatever you do, use one!


Until next time!

Tuesday, June 22, 2010

To UV or not to UV...

The next article will land before the weekend and will deal with UV filters and hoods. Due to time constraints I might very likely revert to one article per week but the good news is that I am also working on the first article on my other, more equipment orientated blog here:

http://shootingwideopen.blogspot.com/

I would prefer to put out one good read rather than two mediocre efforts per week.

Chat soon.

Monday, June 21, 2010

To UV...or not to UV...and one or two related questions...

This is really an age old debate with no clear answer either way but let us explore both sides of the filter and, once armed with a balanced argument, you then decide for yourself...

What does it do...what does it NOT do...and what should it do for you?

Let's start with what it is...

UV filters go by a few other names such as lens protection filters, haze filters skylight filters...although a skylight is technically rather an indoor lighting filter...and who knows how many others but they have been with us since the days of film and they will hopefully be around for a long time yet.

A UV filter is essentially a round piece of glass inside a metal bezel with screw thread so it can screw onto the front of the lens. It is optically neutral and should not contain any optical impurity or colour cast. In theory it should improve landscapes by cutting through the blue haze of bright harsh daylight and improve general harsh light conditions because of it's ultra-violet cutting capabilities...here follows some geekspeak...

That which we know as white light is electromagnetic energy which fits somewhere between radio waves and micro waves on the low frequency or long wavelength end and X-rays and Gamma rays on the high frequency or short wavelength end.

It is generally accepted to start at approximately 400 Nanometer at the low frequency side where Infrared becomes visible red light and end at the high frequency end at approximately 700 Nanometer where visible violet light transitions to invisible ultraviolet light.

Let's start with wat it does not do...

It does not cut out UV light completely!

Some top notch UV filters are said to make a bit of a difference from 350 Nanometer to 400 Nanometer but most cheaper ones don't make much of a difference above or below 400 Nanometer.

Anyone wanting to know more about this, place a comment, mail me or something or read the next paragraph for a clue in finding the long and technical answer. I love the technical stuff but I did promise to keep the geekspeak to a minimum, remember?

Now, if you Google it,you are bound to find dozens of sites and more opinions showing and endless variation of graphs and all sorts of "scientific evidence" on many brands of UV filters, some known some not. Not my kind of thing. Interesting when I am extremely bored and the lawn is done and there is no ironing to be done...

So what is the bottom line here then? Let's look at what a UV filter will do for you...It can and will protect the front element of your lens. Optical glass used in camera lenses and other high precision optical instruments is MUCH softer than normal window glass and it is also coated with various secret goodies which improve the passage of light through them.

The price you pay for this protection of your lens, apart from buying the UV filter to begin with, is a slight to very slight to possibly non-existent sacrifice of image quality.

So the bottom line is simple really, let your shooting environment dictate in using a UV filter as lens protection at a nominal or non-existent fee...except for buying it of course. That fee will be degradation of image quality.

The coatings on lenses and the optical glass used in lenses are quite fragile. Now before the $20-filter-on-a-$1000-lens gang comes a calling with violin cases, please hear me out.

If photographing off-road motorsport is your thing, fit one and have two in the bag for back-up. Stones fly about and having your $ 1000.00 lens' front element dinged is bound to spoil your day or maybe even your week. It will also most certainly lighten your wallet considerably regardless of whether the lens is repaired or replaced.

It happened to a mate right next to me...he wrote off a $100 polarizer but saved his $ 2000 lens when a little pebble flew off a rally car's wheel.

Similarly, if surfers or seascapes float your boat, fit a UV filter. All that sea air may not ruin your lens after the third shoot but will do it's bit to give you a hard time cleaning the front element. Heaven forbid some salt spray should splash onto it.

No doubt there are many other situations where a UV filter can save a lens...little ones and sticky fingers...so if you need it, fit it.

But for goodness sakes, PLEASE buy and fit a decent brand. A bum UV filter can make you think your lens is faulty. You might discover this only after your nice annual overseas holiday or safari or honeymoon. No problem...simply go again and redo all those pics. Yeah right...and we all go by the surname of Branson and all those lions will be waiting on the same spot.

This blog is not about flaming brands and so I shall refrain from pushing or flaming any brand of any type of equipment unless there is a really good reason to do so but what I can say is go for a high quality (read: EXPENSIVE) Hoya or similar well-known brand. Please don't buy the one that has been collecting dust in your local camera store for the last 10 years either. Get recent stuff that has been designed for recent lenses in the digital era.

Personally, my 70-200 zoom is my mainstay lens and this has a Cokin slimline UV on it...which comes off as soon as shooting conditions allow it. My lenses used in studio-type environments do not have UV filters and will most likely never get any either.

Why is this you ask? Because a UV filter does degrade image quality. To such a small extent that it might not be worth mentioning but it does degrade image quality all the same.

How much? Well, have a look at the examples down below and you be the judge.

Think about it, shooting all your images through an extra piece of window glass which was never placed there by the designers of the lens...OK, I am sure the good folks at UV filter factory X might be offended but I have seen (and owned, yes...sigh...) some UV filters that could be jolly happy to be compared to window glass.

Fact remains, even if your UV filter is top brand X's best model, it may cause some unnecessary hassles when light bounces between the UV filter and the front element. There are more than enough places inside the lens and camera where light does bounce around and do other unwanted things, why then, would you want to add one more deliberately?

Which brings us to part 2... The matter of hoods.

Sunday, June 20, 2010

Removing unwanted things from your images.

Well, this could be a piece of junk in your landscape, a street sign or even your Ex...there are many ways to do it but let us start with an easy  one that is not too easy so it will still help you to learn the tool. Please welcome our friend, the Clone Stamp tool.

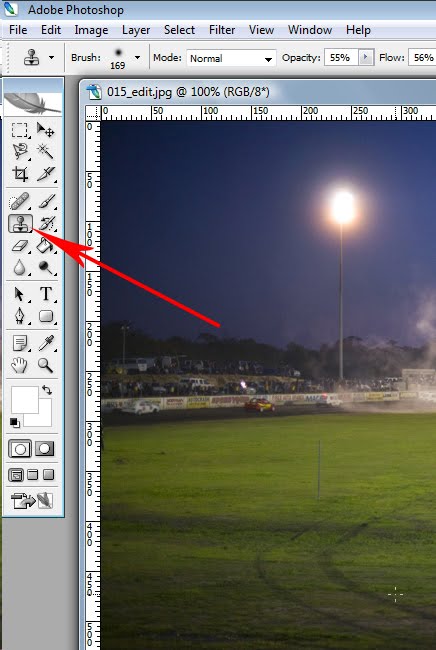
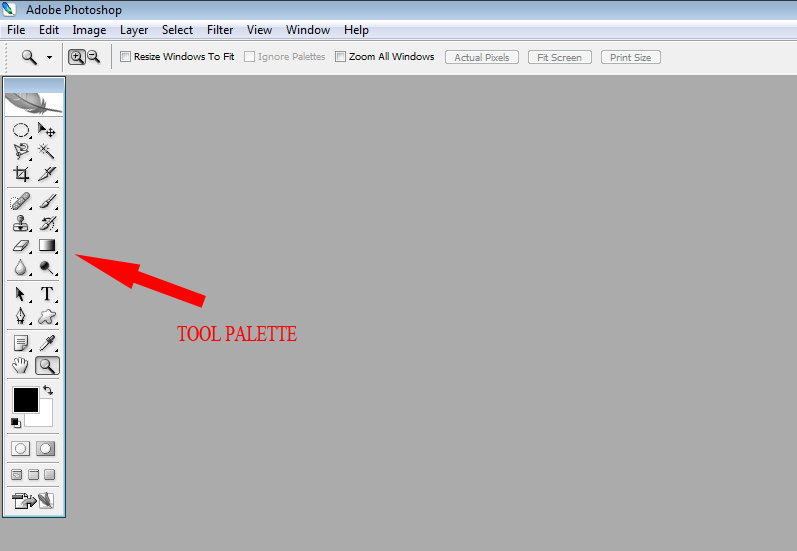
In Photoshop CS2 it lives here


Consider this image here. I was at one of the local oval track raceways on a family outing and had to take some pics of course...how could I not...the perfect excuse was testing my new 50mm f/1.4 lens. One of the cars caught fire and it went off the track for the marshalls to extinguish the fire. I thought I'd get a wide shot to show the whole scene.

Well, to be honest, I had no choice shooting the far end of the track...


I did some basic quick tweaks to this image. I had to, considering I was shooting my trusty old 5D Mk I at ISO 1600 or 3200 and the lens mostly at f/1.4...which is wide open...lovely...this is what it is meant to be able to do!!

This will make some pixel peepers out there toss and turn tonight but who cares? Photography is about getting the image.

I pulled the exposure back down by about 3/4 to one full f/stop in the RAW tool, also known as ACR or Adobe Camera Raw. The reason for this is that there is bound to be some noise in the image and doing this takes care of most of the noise.

OK, some geekspeak first...it doesn't matter if you shoot a 2014 model 120 Megapixel Hasselblad H7D or a cheap-and-nasty Pentax *iST D whatever alphabet soup is to follow, under these conditions noise will show on ANY sensor. As I am WAYYYYY too stingy for noise-fixing software (and there are some good ones) I mostly over-expose by about 2/3 f/stop, sometimes one full f/stop and simply pull the exposure back down in post processing such as ACR in this instance.

It also fits nicely with my life mission of getting it right when I push the shutter button the first time...I am (and used to be) a hard-core film shooter remember? 

Please note I said most of the noise. What is visible on the screen and what is visible on a printed version of the image will be distinctly different as any half-decent monitor is capable of displaying infinitely more than what most minilabs can reproduce on paper.

I used the ACR white balance tool and adjusted the white balance manually to where my visual reference told me white was represented accurately under the yellow flood lights.

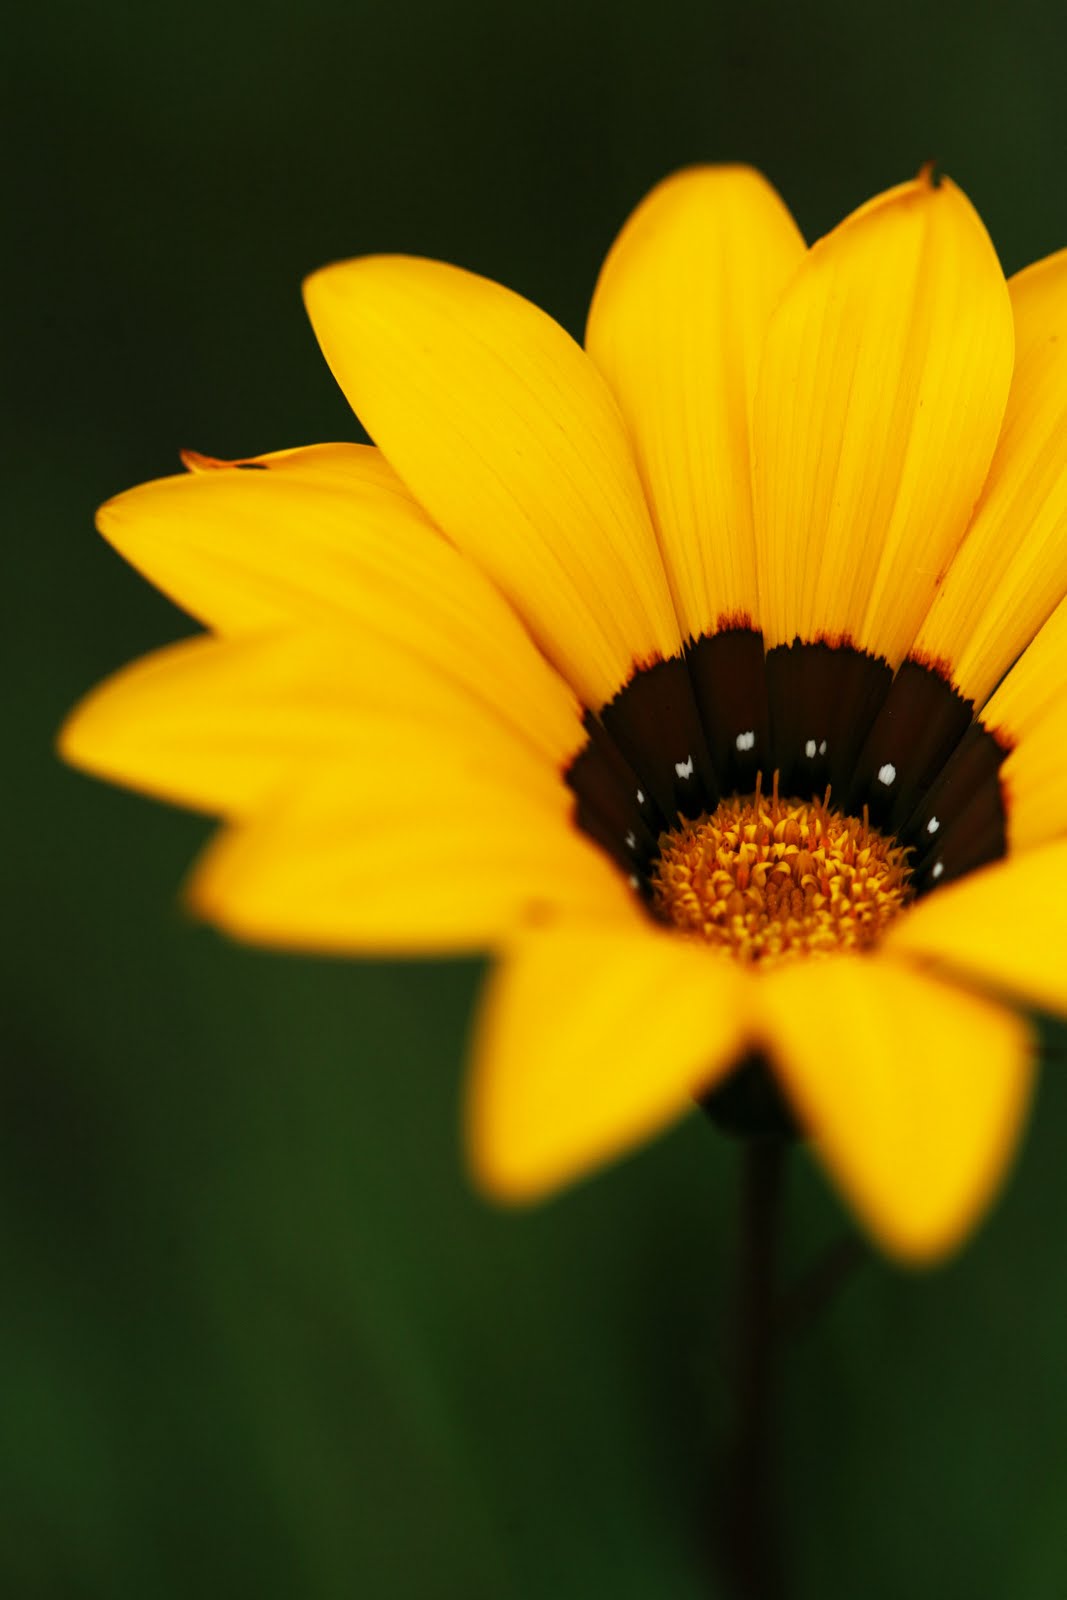
Oh, and I ended up doing a "Hue / Saturation" adjustment layer with this image here once I opened it in Photoshop.

Flattened the layers, cropped it and there we go.

There is no magic to the quoted sequence except that I mention it as I remember it. And, obviously, the white balance and exposure adjustments have to be done in ACR first before the RAW is opened into Photoshop and the rest is done.

In the near future I will do an article on RAW and the ACR tool specifically but I have a few requested items to run through first.

Right, back to the Clone Stamp Tool...


Please do not confuse it with it's brother, the Pattern Stamp Tool. Remember the little black triangles on the tool palette? They remind us that there are more tools behind the active one. As can be seen here...


Right, so we left click once on the Clone Stamp tool to select it and here the fun begins.


Now fight that urge to get up and run away...

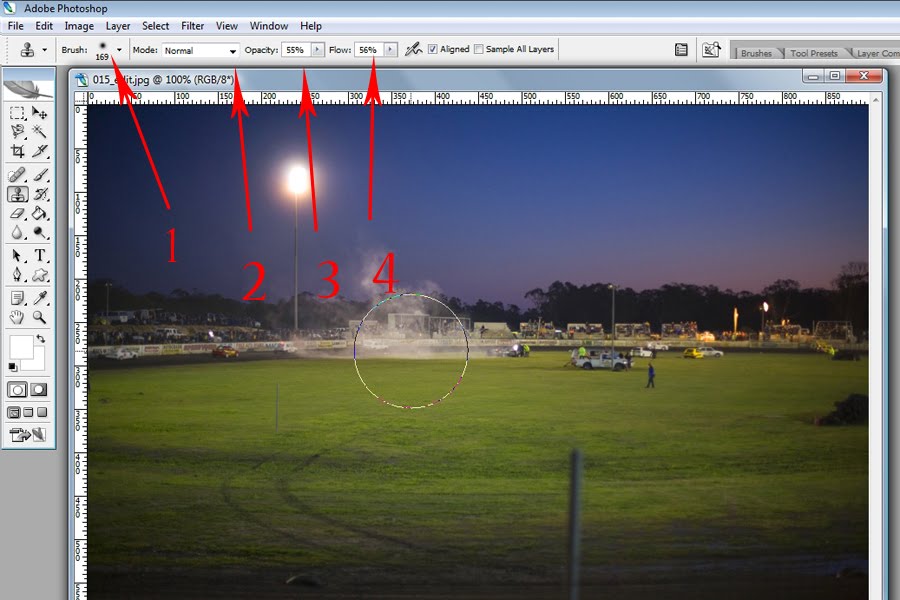
The four red arrows numbered 1 to 4 will show you the way to get going with the Clone Stamp tool.

Did you notice that the cursor suddenly changed shape when it his over the open image? It shows a circle the size of the brush as indicated by arrow number 1.

If it doesn't, go to the text menu system and go "Edit >  Preferences > General. Note the keyboard shortcut "Ctrl + K"...  No need for caps lock to be on.


The pop-up dialogue window will look like like this:


Click the "Next" button until you get here:


If you like, play with "Painting cursor"  and "Other cursor" options to see what they do.

By now I think the importance of Rulers switched on might become clear. Also, having the ruler units set to pixels will soon become clear.

Now for arrow number 2:


As for blending mode, leave it to "Normal" for now. Later on we will experiment in much more depth when using layers and these blending modes will then have much more meaning.

As for arrows 3 and 4, think of a spray painter and his spray gun. The Opacity slider at arrow number 3 might be equal to the thinners and paint ratio in the spraygun...more thinners and less paint equal thinner coverage so you will have to pass over the same area repeatedly to cover it. The reverse is as true...more paint and less thinners equal thicker coats.

Both have their benefits and drawbacks.

As for the "Flow" slider at arrow 4, more equals more and less equals less...lower percentages for greater numbers of passes.

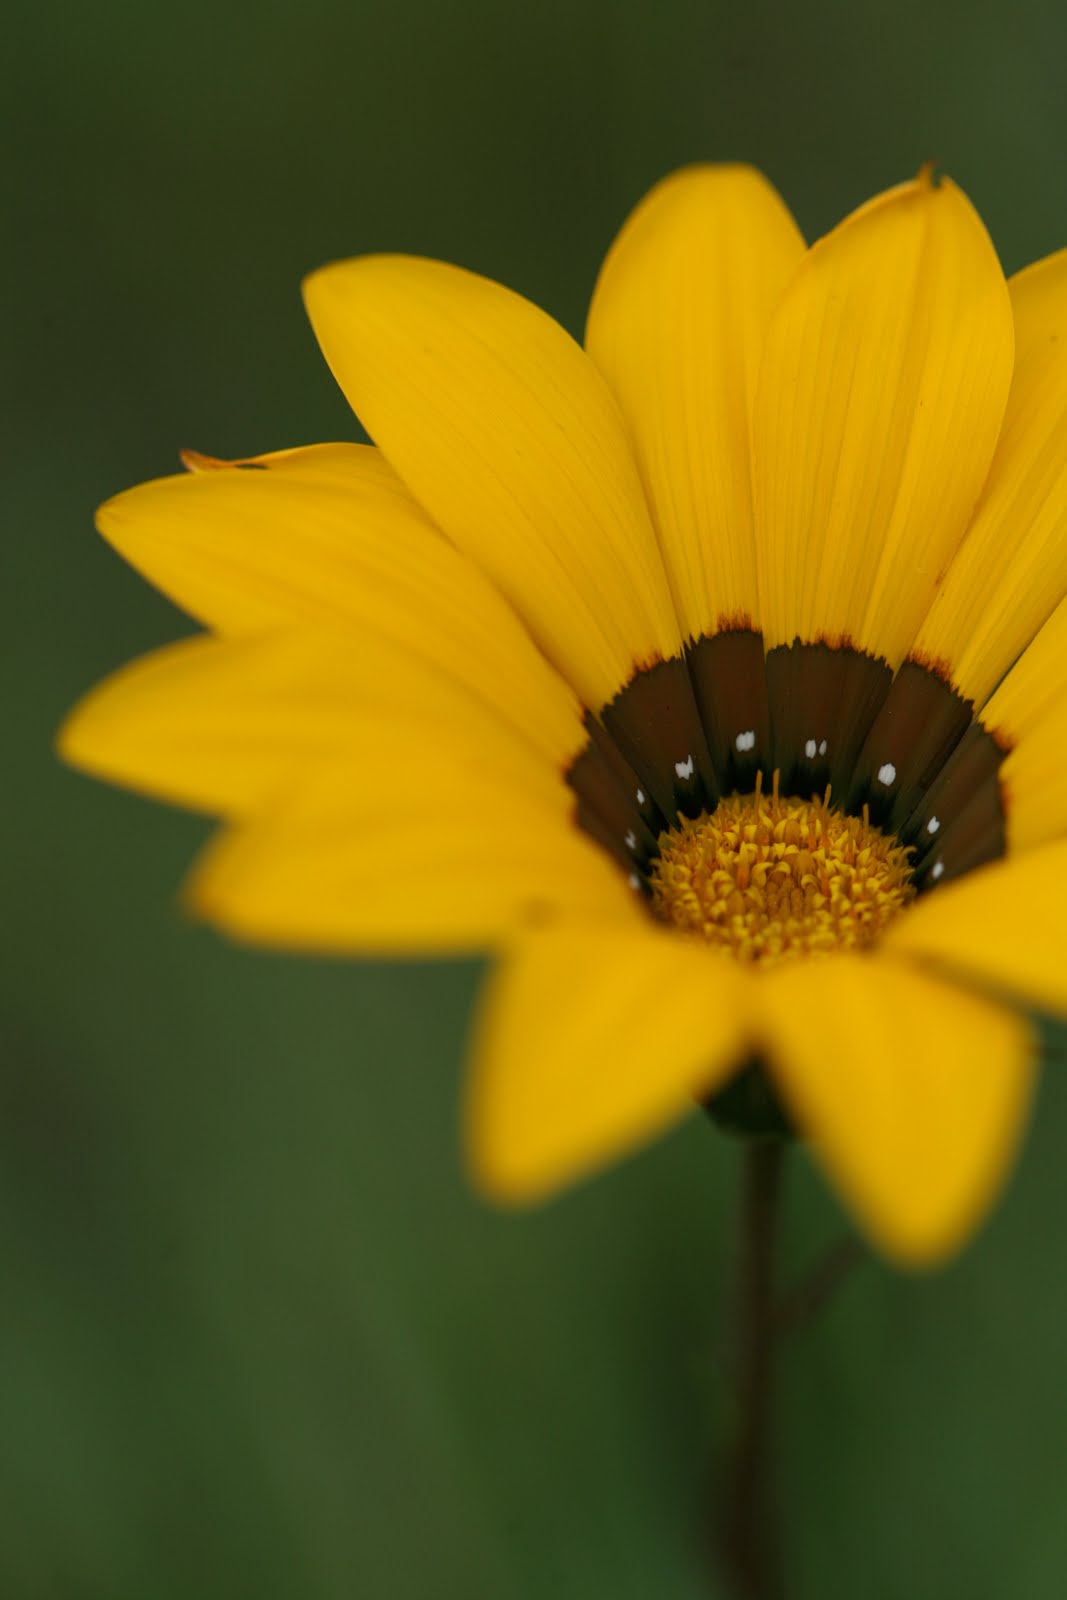
Now let's get to play. Remember this image here?


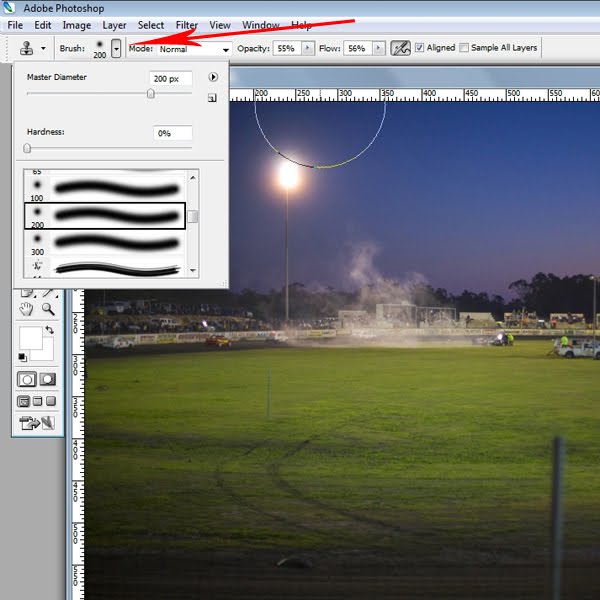
To start, select the brush size. Note the little button in the image below. Clicking it will give you the menu below in which you can pick the brush diameter, hardness and type.

See the circle? Just a tad over 350 pixels but the selected brush says 200? Don't worry, it is a soft brush and very often a soft brush yields the best result for this kind of job.

The wire mesh is almost invisible but the pole is very much there. Let's get rid of it. 

Now it is often (if not always) better to work with a smaller brush but let's see how it goes...

STEP 1: Select the Clone Stamp tool in the tool palette by left-clicking on it once.

If the Clone Stamp tool is hidden it can only be behind the Pattern Stamp tool so right-click the Pattern Stamp tool and then select the Clone Stamp tool from the pop-up icons.

STEP 2: Adjust both the "Opacity" and "Flow" sliders to around 20% to 30%. You can get more radical later but keep it simple for now.

STEP 3: Hold the cursor near the pole to the right of it with the cursor circle close but not touching the pole.

STEP 4: Hold down the "Alt" key while left-clicking once. This will define the sampling area where you want it.

STEP 5: Start removing the unwanted item click by click.

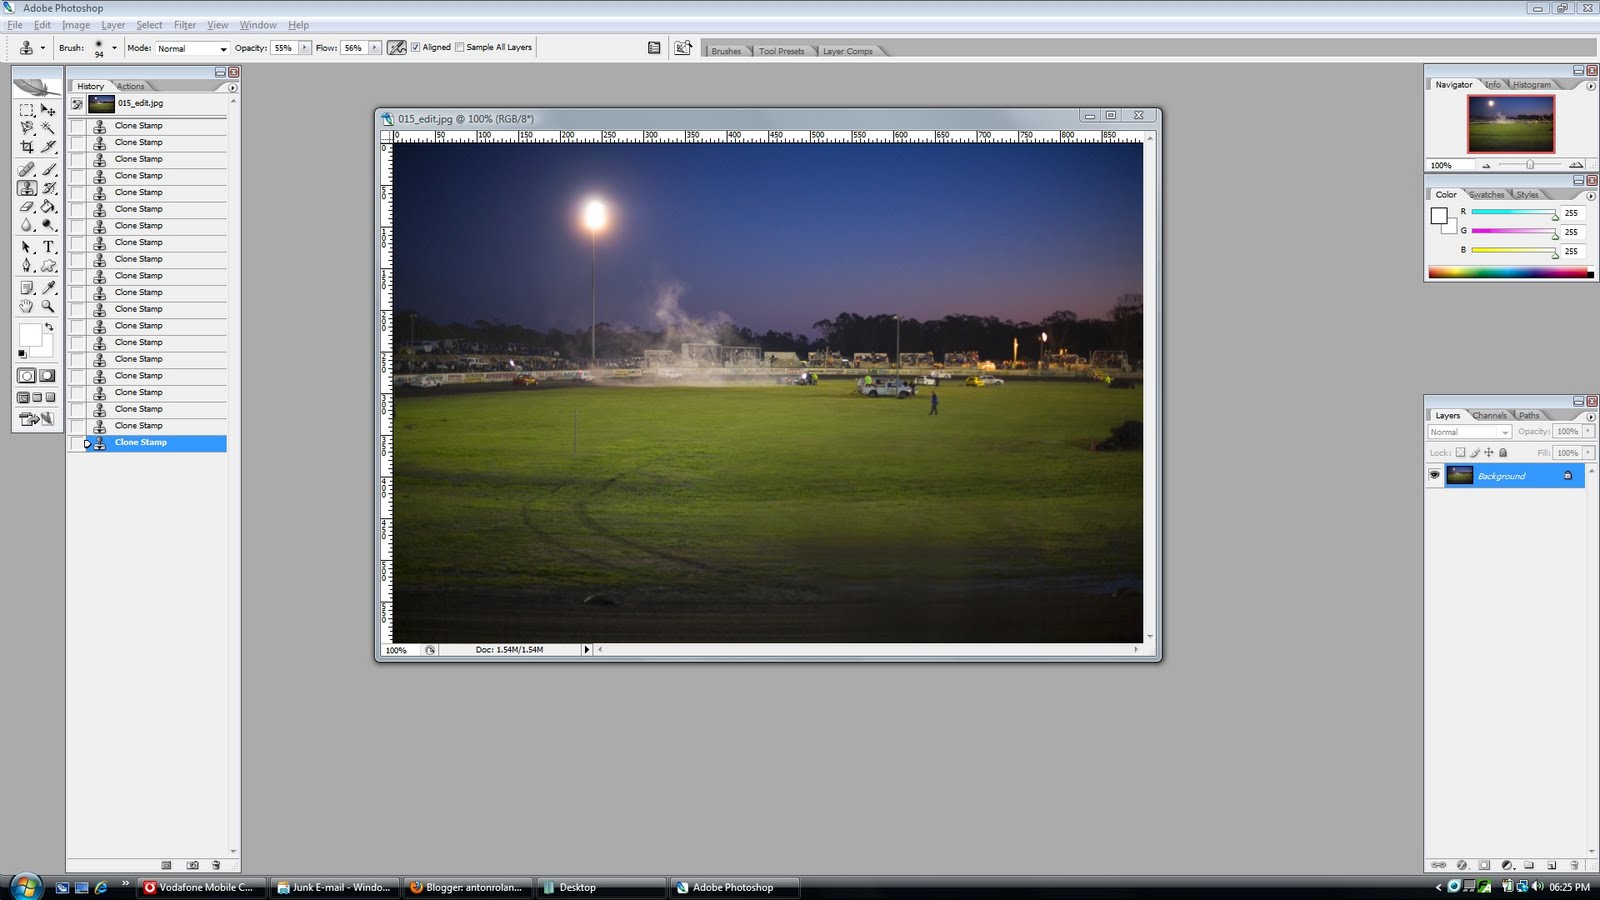
About 50 to 60 or so clicks later the pole is gone...


Well, not perfect, sure because this was a bit of a rush and anyone who is half sharp will see that the area where the pole was now looks a bit funny.


If you were really sharp you would have seen that I went against my own advice and used Opacity and Flow sliders set to mid fifties...bad, bad  boy...

Also, I started out with a brush WAY too large and went down to a brush sized at 40 to 50 pixels.

Sadly, as with all the worthwhile things in life...there are no shortcuts. The long way round is the fastest way every single time.

What I hoped to accomplish, however, was to demystify the tool and get you to work with it. As for the rest? Practice makes perfect.

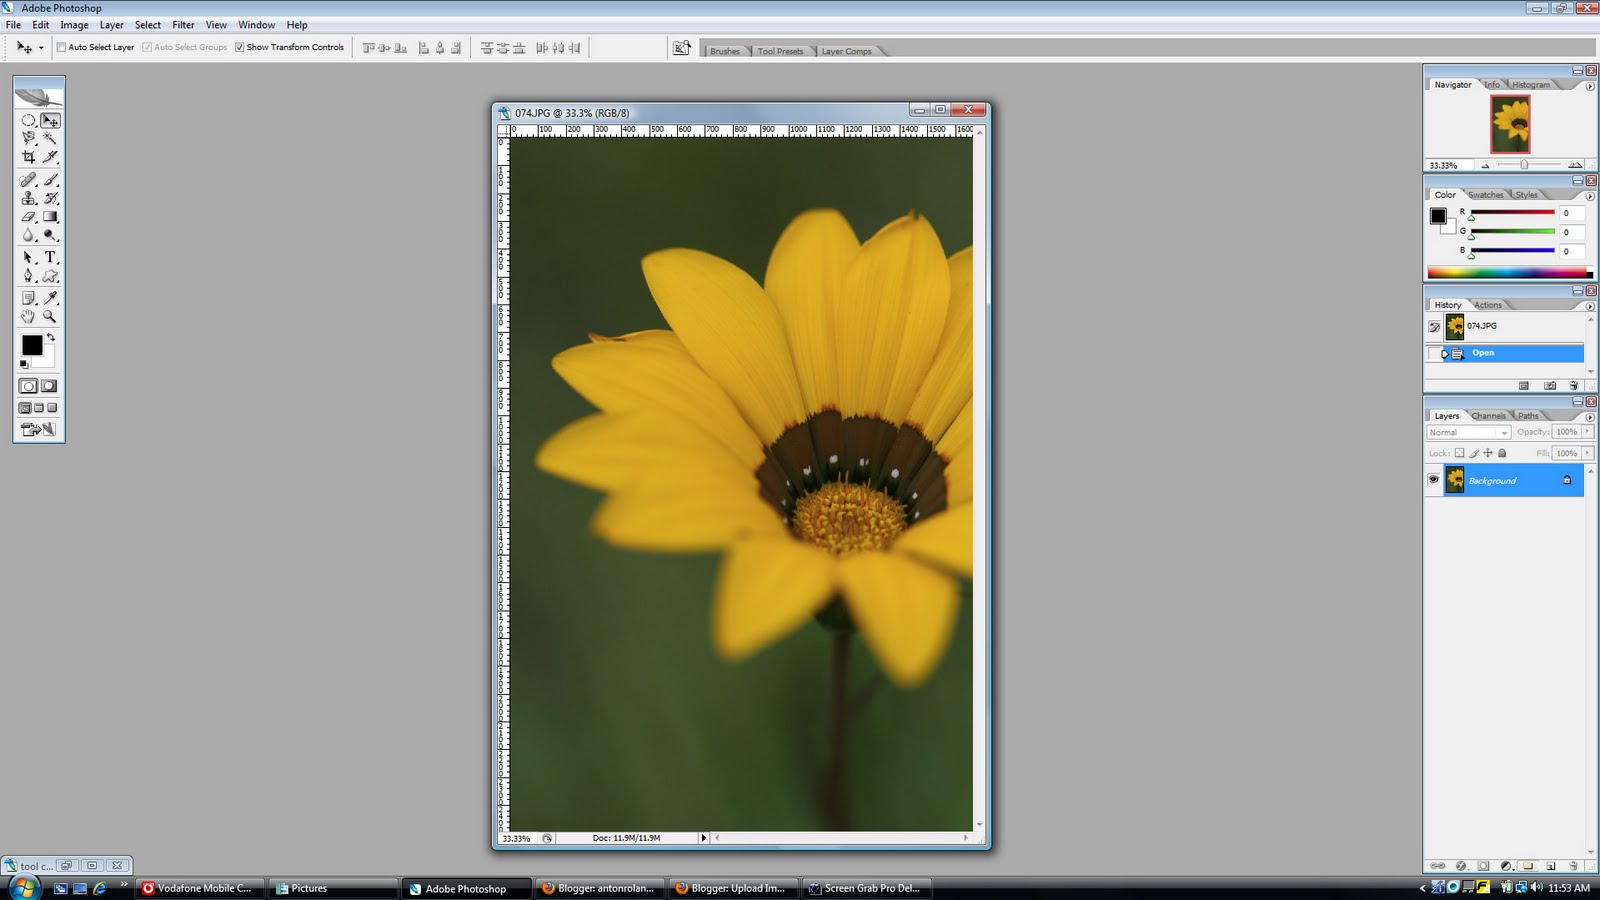
A very handy tool here is the keyboard shortcut to undo 1 step at a time...press the "Ctrl" +"Alt" + Z keys simultaneously and repeat as desired.

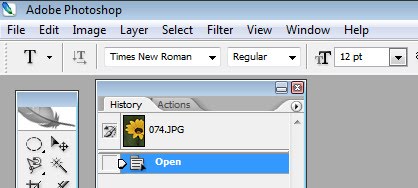
Note the history palette which I dragged out to my usual spot. It is filled with 20 lines of "Clone Stamp". If you should merrily clone away and reach a point where you are really not happy with things anymore your only option might be to close unsaved or click back to the "Open" state at the top of the history palette...both ways losing most or all of your previous work on that image.

A good reason to work with adjustment layers where possible I say.


As for the end result? Well, the pole is gone but this would score no higher in my books than quick and dirty. For better results apply some time and patience.

I hear some of you say you can do MUCH better than that! And I cheer you on all the way. Go on then, you can do it!

And that (thankfully) is in your hands.

As for the little hidden gem...it will have to be the parting comment...NEVER save a JPEG if you can help it. Save your images in .tiff, .psd OR simply go back to the RAW and start over from scratch. Images to be printed can be saved in JPEG ONCE ONLY right at the end of the editing process..also for web use, JPEGS are sort of essential.

Other than that, please avoid them and DEFINITELY NEVER resave a jpeg in jpeg format. There, I said it...now I can sleep tonight.

Until next time!

Wednesday, June 16, 2010

Some more on Layers and other stuff...

Following up on my previous article I thought I could just throw in a little bit more about layers and one or two other things.

Let's start with the other things.

Remember this screen here:


This was what a bog-standard Photoshop CS2 screen looked like when you opened it. So not much happened until you opened an image...


This now begins to look like business. Now you can work with this image as is or you can maximize it. If you work with more than one image at a time (such as building a collage or designing a business card) it does make life easier to be able to see where the others are without having to minimise, maximise and restore down all the time.

Also, note the rulers around the image. Essential. To switch them on, go here:


Please note that the little tick present shows that Rulers are already switched on. Also note the keyboard shortcut shown. Magic stuff.

Now, these rulers can be made to show different units and there are lots and lots of more goodies with which we can tweak Photoshop to suit our needs.

PLEASE PLEASE...HUGE DISCLAIMER HERE...let your individual PC skills be your guide as to how far you want to push this tweaking exercise. It is generally not easy to mess things up completely as long as we pay attention to the pop-up warnings but one step too far without paying attention and things can go south spectacularly...personal experience speaking here folks.

Now then, here is one of the first places to go to start modifying Photoshop. Please proceed with caution and at your own risk. Tried, tested and necessary things will be shown in these articles from time to time and will also be explained in detail so you can decide for yourself if you want to give it a go or not.

Here it is:


So I fluffed it a bit...the "Units & Rulers" should have been highlighted in blue because that is where you should have clicked to see this pop-up dialogue window here:


Now those out there with more PC skills than myself...you are the vast majority, promise... will immediately spot the drag-down menu taking you to other options inside the "Preferences" menu. Also, the "Prev" and "Next" buttons top right should give it away so you don't need to keep entering the menu system should you wish to perform multiple transactions in one go.

The important thing here for now is to look at the top block labeled "Units" In the white drag-down field labeled "Rulers" there are the following options which appear when you click on the little black triangle.


I tend to leave untouched that which I don't understand. It is way too much effort to reinstall Photoshop and lose all my other tweaks if I mess things up beyond the point of return.

What is very interesting is the default settings in the "New Document Preset Resolutions" block. You WILL see this material again.

And what about more on layers I hear you ask...

Have a look at this:


This is a screen grab of the Layers Palette of a quick and easy business card design I did yesterday. It consists of a scanned textured paper for a background, five different text layers and a Hue / Saturation adjustment layer to boost the background colours.

Simple, quick and not nearly as complicated as it looks, trust me. As a point of interest, those layers can be dragged up and down for visibility effects although none will be visible here but we will return to that point in future articles.

And the image resulting from these layers? here it is:


Not quite the final product yet but getting there.

Oh, and one more thing, when we start working with layers and we need to close the image before it is complete done, simply save the image as a .PSD file.

Simple, like so:

Go to the File menu system as shown below and click on "Save As"  Did you spot the keyboard shortcut there? This one will save you truckloads of time in the long run.


now be sure to save your work in the correct file type


 Simply select the "Photoshop (*.PSD.*PDD) option as shown above and save as always where you want it with the layers preserved for next time.

So there we have it. We have now seen how to start tweaking the inner workings of the beast and we had a sneak preview of things layered to come. Many many more to follow.

As for the little hidden gem of the article, please remember the following: Always view images in magnification percentages divisable by 5. What the heck?

Simple really, look here:


And here:


Using the zoom tool to increase or decrease the size of the displayed image will alternate between zoom percentages divisible by 5 (12.5, 25, 50 etc) and percentages divisible by 3 (33, 67 etc)

This might have changed in later versions but in mine, for some reason images might (and DO) display very jagged on zoom percentages divisible by 3. Simple really, avoid those percentages and stick with the fivers.

Until next time!

Saturday, June 12, 2010

Now let us jump in the deep end!

Yep, enough of the basics and lets do a quantum leap or two. At the end of this article most of you will say that this was nowhere near the big deal you originally thought it was. OK, don't take my word for it...

Let us jump into working with LAYERS!!

No, don't run away just yet. Working with layers is a total non-event but let us ease into it.

Make no mistake, working with layers can and does get very complicated but if you understand the basic idea you can do anything if you have a monster PC to manage the files without hanging.


Not a bad image, straight off the camera as I always shoot RAW + Jpeg and this image is the small low quality Jpeg. I have since adjusted the settings to small but highest quality for the Jpeg accompanying the RAW file.

I do this because I always attempt to get it as right as possible at the time of exposure and having a small Jpeg at hand is convenient for publishing to the net or e-mailing or Facebook or whatever the need is at the time.

Only problem is that this image lacks vibrant colour...or punch as we sometimes say. The image was shot overexposed slightly, which is always a good thing to do but it looks a bit flat.

We fix it with LAYERS!!


This is what the image would look like when opened in Photoshop CS 2

And this is what it looks like on my screen:


The only real difference is that I dragged my palettes all over the place. The "Layers/Channels/Paths" palette was at the bottom right. Directly above this was the "History/Actions" palette. This now sits at the left next to the Tool palette.

The remaining two palettes remain top right as they were...for now.

This is how I do it now. It might change in a week or two but as we learn and progress in Photoshop the program can be tweaked to suit our work methods...in ways I don't even begin to understand but it can be done.

If, at any time, you want to restore the palettes to their default places and sizes, simply go to the File, Edit, Image menu system top left, select "Windows > Workspace > Reset Palette Locations and everything jumps back to where it was.

The reason for moving stuff around will soon become evident, I promise.


Let us establish a convention. My wife regularly accuses me of rambling on in geekspeak so I propose to do the following: Whenever I launch into a technical tangent I will try to do so in bright blue text...like so.


That way, when you see the bright blue text, feel free to move along swiftly...at your own risk though as you will see that material again.


The reason why it is better to start using layers off the bat is (1) we get an immediate or much quicker understanding of the basic principles of layers and (2) advanced edit options open up without having to close and start afresh and waste time.

Later we will see that it is very easy to edit (cloning, healing etc) past the point of return as far as the on-screen log of the History Palette will allow. But more on this later.


OK, back from planet geek...


OK, so things suddenly started looking a wee bit complicated but let us take a look step by step at what now happened here.

Consider the red arrow above now pointing at the Layers Palette. What you see there is a layer. It is typically what a Jpeg opened in Photoshop will alway look like. From left to right you will see a little black eye in a grey tick block. This will become important again later.

This layer highlighted in bright blue (indicating that it is the actve layer) contains a very small thumbnail image of the open image and it also happens to contain a little lock indicating, you guessed it...it is locked.

Now let's get going...

 
I hope to figure out a way to take a screen grab while hovering the mouse in the right place but having to use the mouse means two things at the same time...a bit difficult...

OK, go here:


A little pop-up window like this one will appear:


Click on OK and don't worry too much about the other options. To be very honest I don't have a clue either but we will find out together...eventually.

The Curves dialogue box will now pop up and it looks like this:


Please note the difference in the Layers Palette. There is now a new blue (active) layer labelled "Curves 1". Please note the little diagrams inside it which partly identify it as a "Curves adjustment layer" but as for the others I really don't have a clue...yet.

As I am also quite sneaky I will hide the parts where I admit not to know in blue geekspeak  where most of you will hopefully scroll past...oops, shouldn't have said that should I?

Now, the way to go with the Curves diagram is to drag it into a gentle S by left clicking on the diagonal line and, while holding the left-click button, dragging the straight line into curves and watch what happens as you do so ...like so:


Please note the red arrow which points to a checked "Preview" box. Always ensure that this box is checked so that any alterations to the curve show you what changes you make as you make them.

Now go to the Layer Menu again and left click on the "Flatten Image" command line.


Have a look at the Layer Palette and we see that there is only one layer again and now we can save the image for the intended use.

This part in itself deserves an article so let's stop there for now. Here's hoping I can do a small mid-week article to cover some of the peripheral matters.

The end result of this little mission? Two-fold really.

First, we lifted the colour of a flat image and gave it some punch.

Secondly, we (YOU!) worked with layers. Early days yet but it wasn't that difficult was it?

As for the results? This was a quick "rough-and-ready" edit to illustrate the method. The real results are up to you.

As for the curves method, play around and go crazy. Some really wacky creative results can be had if you really go crazy with it.

Enjoy!!

Keyboard shortcuts

Now might be a good time to discuss keyboard shortcuts.

When you start working with loads of images you will eventually discover why working with a mouse can be a huge waste of time. There are many keyboard shortcuts that seasoned computer users will be very familiar with...I also discovered them recently...ctrl + O...press and hold the "Control" key while pressing the letter "O".

This opens a pop-up dialogue box from where you can select the image you want to open from the relevant file directory.

Equally simple, "Ctrl" + W will close the image currently in use.

This might sound silly but use a mouse 100 - 200 times a day and drag it halfway across a 23 inch screen to open and close images and you too will begin to love this idea...especially if you have to meet a deadline.

The Photoshop basic layout - the tool palette


This is the heart of it. By default it will be top left but you can move it where you like it. This might be one of the big reasons why you would like to invest in a bigger screen so you can move them all over the show and place them where you like them.

When we start working with images at large zoom numbers and the palettes come into play I am sure you will understand why I lust over a 30 inch display.

Have a good look at the tool palette and hover the mouse over all the icons in it. You will note little black triangles bottom right at most of the tools in the palette. These indicate more tools behind the front one being displayed


What we have here is a portion of the tool palette and the red arrow points to the history brush tool. Hover the mouse over it and the name will appear in a little text field roll-over next to the tool. Note the little black triangle below the tip of the red arrow. This is your cue that there are two to three similar tools behind the one on display.

Right-click on the front tool to see the rest of the group.

This whole thing is useless without images!!

Indeed, so if you would bear with me, some images might follow soon..

Please bear with me here as I am working with different new things at the same time but, hey, so we learn together.

What you are seeing is a screen grab of the main screen of Photoshop CS 2 when it is opened. Click on it to see a larger version.

This is where I take my cue to go and figure out how to manipulate these little screen grab critters.

Friday, June 11, 2010

So where do we start?

It really doesn't matter what equipment we use. If your style of photography needs certain equipment, chances are that is what you will use. Then there are some of us who buy nice kit because we can. Nothing wrong with that as long as your kids don't starve but please do not think that the next bigger camera will enable you to make great pictures at the press of a button. In fact I will almost always bet on the direct opposite.

Again, with the vast improvement in technology lately and micro processors doing more and more wonderful things, lots of things are becoming more automated than ever if you can live with complex menu systems and user interfaces but I digress...

Regardless of whether you print your images or view them in any number of electronic displays, almost any image can almost always be improved to some degree.

Let us focus on some Photoshop ideas. There are many other packages out there yes, some free, some not quite as expensive as Photoshop but anybody and everybody involved with photography will eventually be confronted with it.

When facing Photoshop of any version for the first time you might feel like turning around and running.

I know I did. Please don't.

Take the time to learn Photoshop and you will probably never want to use anything else ever again. Does this mean nothing else is good? Hell, no, there are many great photo editing packages out there...Corel took over Jasc Paint shop Pro some time back, ACDSee Pro is also very good and there might be many more.

Despite being intimidating at first, Photoshop is expensive. No argument there, it is expensive, end of story. Whether you buy in Pound Stirling, Dollar of whatever origin, Pesos or Rupees, Photoshop will lighten your wallet considerably. If this is a real consideration to you, buy Photoshop Elements. Photoshop Elements version 8 is a slightly scaled down version of the full version - currently CS 5.

But whatever you do, whichever package does it for you, please buy the real deal.

Neither this nor any other site where I have an input will ever condone piracy in any way, shape or form. I don't care how you slice it, NO PIRACY - PAY THE ASKING PRICE OR GO WITHOUT.

In the course of the next few days I will put together an article of two or three basic techniques with which to get going. Chances are this will branch out into various directions but let's see if we can keep it simple. Now I am no Scott Kelby but then, if you knew who he was you would possibly not be reading here...

Thursday, June 10, 2010

Random ramblings...

So we are all photographers nowadays.

Who cares really?

Well, there are some established pro photographers out there who do care as the huge popularity of digital cameras have revolutionized the game known as photography. Digital SLR cameras have recently sold in numbers bigger than film SLR cameras ever did. This is a good and a bad thing, depending on who you ask.

As a veteran chat forum junkie I have picked up on several "established pros" who go rabid at the idea of some new dude with a camera who wants to become a wedding photographer. I wonder why this is? Are weddings seen as easy money? It is not, believe me.

As a veteran pro friend of mine recently shared with me, there has been a definite loss of revenue and jobs across various sectors of what used to be a diverse photographic job market. Why? Because Jim, John and their mates all recently got themselves a digital camera for obvious reasons and chances are it is possibly even a digital SLR. It looks the part so much more than a point-and-shoot, you know?

For the established pro this only really means that Jim and John can now churn out competent images in their respective workplaces that previously would have been a nice little filler bread-and-butter job for Mr Pro Photographer.

The relevant question is: can we fight it? The very real answer is no! Trying to fight it would be pointless and only cause great frustration - especially to those who try fighting it.

Think about printers as an example. Who of us could generate today's documents and images at our desks or homes fifteen or twenty years ago? Do you think this did not have an effect on printing companies?

The big irony is that most owners of hundred dollar printers reading this might not even know what a typewriter is...go on then, Google it!

All you googling "typewriter", check out what we had before CD's.

Photography simply moved with this wave of technological progress and the playing fields will keep changing even more dramatically in the next two to five years than in the last two decades, I'm sure. It takes no rocket science to figure that out.

If you bothered to read this far I thank you and wish to lay the basis for my renewed energy in building this blog. I wish to build my little bit of help for everyone out there interested in photography who want to know more.

As a full-time employed semi-pro photographer I fit nicely in the middle of the road. This is generally not a nice place to be but here I have the security of a salary and the freedom to do jobs when my spare time allows.

I am one of millions around the world in this position, no doubt, but I aim to make a difference as far as I can.

Rather than gripe with wannabe pros I will make whatever little bit of knowledge I have available so I can hopefully play a role in someone putting out a better image.

I will never undercut local pros and I strongly suggest that no-one does this. But...and here is a very valuable BUT...know that your product is on par with your local pro or better before you charge his price.

If you simply wish to do photography for the love of it or for enjoyment you are equally welcome to share what little bit of knowledge I can possibly assist with.

I look forward to meeting all you folks who join me on this journey...and I look forward to learning whatever I can from every single one who reads here.

Enjoy!

Sunday, June 6, 2010

getting this show back on the road...

OK, between Flickr, Facebook, my own site in need of maintenance and this blog I want to get something going that will get me going and hopefully even be useful to someone out there...GOYA, BASICALLY!

This blog aims to fulfil one and only one goal...to help others in enjoying photography. Be it sharing of knowledge, techniques, Photoshop skills or anything else that will help someone (myself included) improve on some technique.

Now...doing it...well that is different thing altogether but let's just say a good place to start would be to apply the self-discipline to get out there and make worthwhile pics.

Worthwhile pics that I can use to illustrate basic to intermediate skills that cost me huge lots of cash to acquire.

In this journey I hope to learn from others in feedback and contributions to this blog, comments, e-mails, anything and anyway you would like to travel with me.

I am no Grand Master or complete expert in every field. Just another fairly regular Joe with a camera or two, some other kit and a very curious disposition.

I have made some huge mistakes in many aspects of my photographic exploits but I plan to make less in future.

Let's see how this goes.