Hello everyone.
For all you wonderful people who may have been reading here from time to time I thought I would just post one final notice to inform you that I now have one consolidated web presence at www.antonroland.com
Please feel free to visit as we start to pick up where we left off.
I trust you will visit the new site that incorporates my new blog and all the other new and exciting stuff!
Anton

Wednesday, May 30, 2012
Sunday, January 29, 2012
The end of the road...here
Well folks, I don't know if this will actually reach anyone out there as this blog has been quiet for so long...
My new super-duper site is being built by the wonderful people at www.creative infusion.co.uk so this is antonroland signing off.
OK, so I will possibly make one final post here and that would simply be to tell you that the new site has launched.
My new site will contain an integrated blog so once this is up we will pick up where we left off with loads of new stuff too!
Watch this space!
antonroland
Friday, July 23, 2010
Boot Camp Part II - The biggest villain to conquer...the TTL light meter!!
In my previous article I explained a bit about the three big factors of exposure, Sensitivity, a.k.a. ISO, Shutter speed and Aperture.
Central to these 3 clowns are a big bad wolf that lurks in the dark corners of the camera and mess up the images we hope to capture...the TTL light meter.
In this article I hope to explain the interaction of the 3 exposure parameters with the camera's TTL light meter.
The exposure parameters are confusing enough as it is but hopefully they are a bit easier to understand now. The only problem is that, in the digital age more than ever, they all submit to the TTL (Through The Lens) light metering and this TTL metering has a controlling share of all the aspects that we should control.
To those of us who speak English that simply means that, no matter what mode you set your camera to or whatever settings you adjust the 3 exposure parameters to, 2 things are certain... (1) the camera's TTL light meter will have a major if not final say and (2) the basic laws of photograpy will apply...those 3 guys...master them!


The biggest trick so far was learning about the three exposure parameters AND how the light meter governs them.
Now we can move on to other aspects if you want to allow the camera some control in the "cheat modes"
For those not interested in fully Manual shooting, be sure to look out for the next article
Central to these 3 clowns are a big bad wolf that lurks in the dark corners of the camera and mess up the images we hope to capture...the TTL light meter.
In this article I hope to explain the interaction of the 3 exposure parameters with the camera's TTL light meter.
The exposure parameters are confusing enough as it is but hopefully they are a bit easier to understand now. The only problem is that, in the digital age more than ever, they all submit to the TTL (Through The Lens) light metering and this TTL metering has a controlling share of all the aspects that we should control.
To those of us who speak English that simply means that, no matter what mode you set your camera to or whatever settings you adjust the 3 exposure parameters to, 2 things are certain... (1) the camera's TTL light meter will have a major if not final say and (2) the basic laws of photograpy will apply...those 3 guys...master them!
Demystifying the light meter...
Light meters used to be basic little needles in the viewfinder which gave a rough idea as to overexposure, underexposure and correct exposure. Remember this guy?
In doing so it got opinions from those other 3 guys and made a decision of too little, too much or sufficient light. But in terms of what?
A brief history of TTL light meters.
In these mechanical and wonderfully simple times the needle in the viewfinder would constantly indicate the amount of light passing through the lens.
In days gone by the light meter was the only thing in the camera that needed battery power.
It would consider the mechanically fixed aperture inside the lens, the ISO speed of the film in the body and the speed to which the very mechanical shutter speed control knob was set.
The combination of these 3 inputs would cause the needle to show the very basic degree of exposure...over, under or correct...and correct was and still is relative.
The CATCH!
Here is the catch...your camera's TTL light meter is looking for this:

Your camera's light meter does not understand colour or what you intend to capture. It understands the intensity of light evened out over the whole image and that is it!
It does not understand this:

or this:

and definitely not this:
It understands light intensity measured against the three exposure parameters the camera is set to and the only thing it is interested in is evening out all the bright highlights and all the dark shadows in the scene to get to this:
Simply put, if all those exposure parameter settings applied to the camera at the time all highlights + all shadows + all mid-tones in the image = the above 18% grey, the light meter will tell you that you can take the picture.
Or another way of looking at it, if the light passing through the lens (at ISO set to 200 with a shutter speed of 1/125 second and at an aperture set to f/5.6) will yield enough light to even out to mid grey over the whole image, the TTL light meter will be happy.
Some modern flavours on TTL metering.
Reading the appropriate sections in your camera's manual you will come across concepts such as Evaluative Metering, Spot Metering, Centre-Weighted Averaged Metering and a few others depending on your brand of camera.
These are all different ways in which the TTL light meter will interpret the scene being photographed. Some of them have a purpose but that purpose will have little meaning before we have a grasp of the basic way in which the TTL light metering interacts with the rest of the camera.
Until we understand the role of the light meter and how it governs the rest of the photographic processes inside the camera there will be a fairly large degree of hit-and-miss results.
Some related thought on modern equipment...
There are numerous factors which have a bearing on exposure adjustments from film days to the latest D-SLR cameras and even simply trying to mention all of them would defeat the purpose of this article.
Dynamic range is one that deserves a quick mention but even this could complicate matters so let us hold it over for another day.
The solution in mastering the light meter?
Simple, really, learn to make do without it!
Yes you can!
By the time you miss it you will be well on your way to shooting on fully Manual settings anyway and you will then have no problem of balancing your scene with what the camera's light meter is telling you.
For some homework, master the sunny f/16 rule:
Set the camera to f/16. This will yield great depth of field.
Set the shutter to 1/100 or 1/125.
Set the ISO to 100.
Now go and take some pictures in bright sunlight and see what the results are like. If your camera is not capable of ISO 100, set it to ISO 200 by all means BUT compensate by setting the shutter faster say, from 1/125 to 1/250 OR the aperture from f/16 to f/22.
As the light goes down you will have to sacrifice depth of field by opening up the lens to maintain the fast shutter speed.
Conversely you might want to maintain the large depth of field and this might mean opening the shutter for longer...beware of shutter speeds long enough that hand-held shooting is no longer possible.
Learn to compensate as you give and take in this 3-way relationship and see the results.
The biggest trick so far was learning about the three exposure parameters AND how the light meter governs them.
Now we can move on to other aspects if you want to allow the camera some control in the "cheat modes"
For those not interested in fully Manual shooting, be sure to look out for the next article
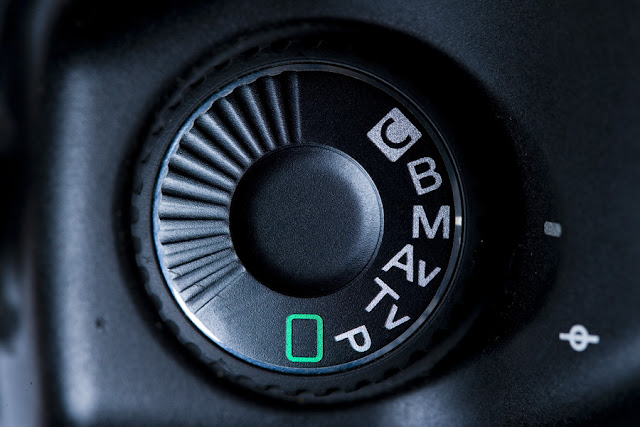
coming up...P,A,S,M...Av, Tv, Program and all those explained...
Woohoo!! No geekspeak this time too!
Now we are ready for this button:
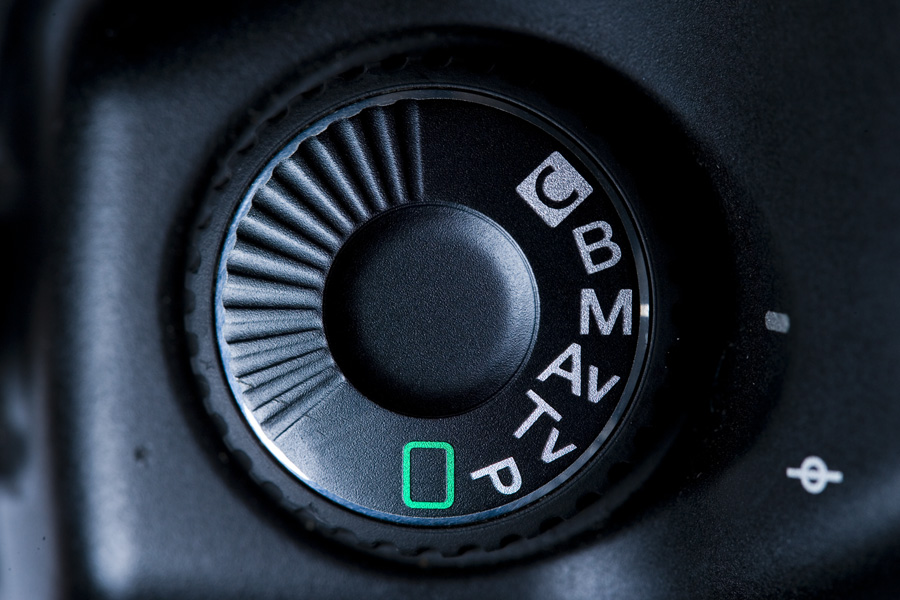
Enjoy and more on this next time!
Woohoo!! No geekspeak this time too!
Sunday, July 11, 2010
Let's go back to boot camp...Exposure - the basics 101
Alrighty then. So we now have a nice camera but learning to work the thing is a bit intimidating.
It does not help much when the wife comes hopping and skipping along, sporting a better pic with the trusty old compact which was handed down to her as it was now completely redundant.
The D-SLR now rules supreme...who wants a compact? Those are for girls...or wives...who keep telling us that there was nothing wrong with the old humble compact because, after all looky here at the pic I got which is so much better with the pic YOU got and that was a lot of money to spend and look, you are not even getting the same results as you used to...
Sound familiar?
Let's kick some D-SLR butt and take things back.
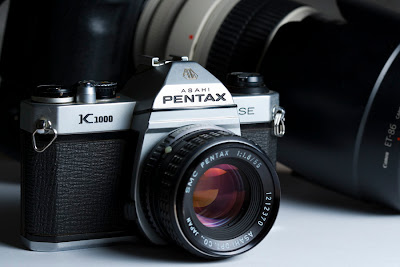
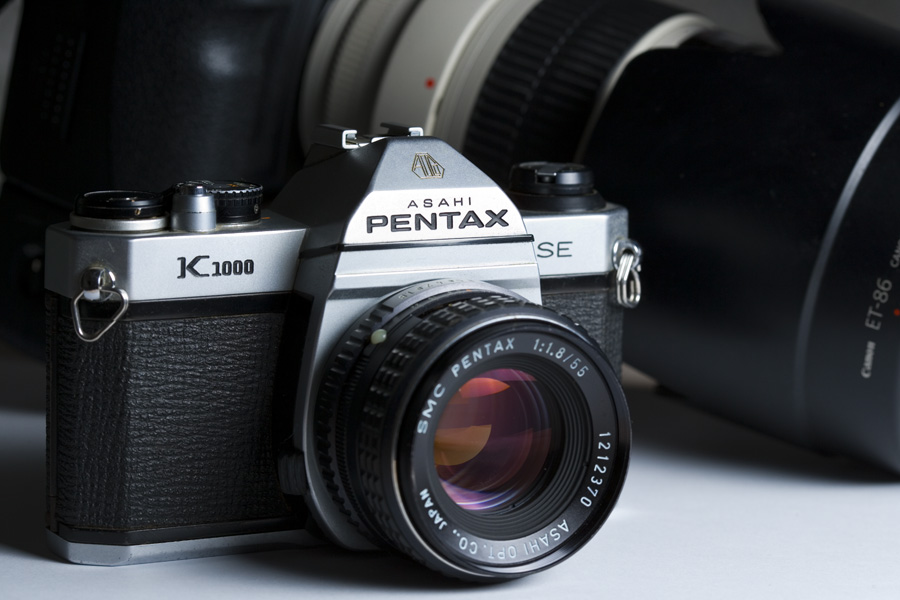
For a start, that nice new toy is NOT a camera. It might be shaped like a camera but that is part of the deceit. This is a camera.

And yes, I used to do weddings with that very camera and a second one like it.
Now I am not about to start waffling, there is a point to this but in the days of this camera, the camera itself was important but it played a very small role in the actual photo that it produced. As long as it was not leaking light onto the film and wound the film on accurately that was it.
For different effects we would use Agfa or Fuji of whatever kind, Velvia, Provia, Ilford for black & white...FP-4 or HP-5.
Sadly this has changed a bit...and therein lies the rub!
Instead of using our favourite film we are confronted with this
On this trusty old K-1000 there was a very mechanical control knob with shutter speeds ranging from "B" to 1/1000 second with speeds like 1/4, 1/8, 1/15 1/30, 1/60 of a second and so on. Which used to be the maximum flash sync speed by the way! No half-stops or one-third stops there!
The lens aperture was controlled by a mechanical ring on the lens like the ones still seen on Nikon's "D" lenses. Again there were very little half-stops and definitely no one-third stops.
ISO was simple. Film was rated to 100, 200, 400 or 800 if you could afford and get it. And do remember that you had to use it up and replace with another one. No press of a button to flip from 200 to 1600. If you had just put in a 36 spool that was a bit of a problem to open in a darkroom, cut and...oh no.
OK, enough of that, fast forward to the present day.
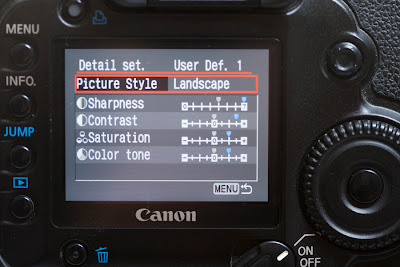
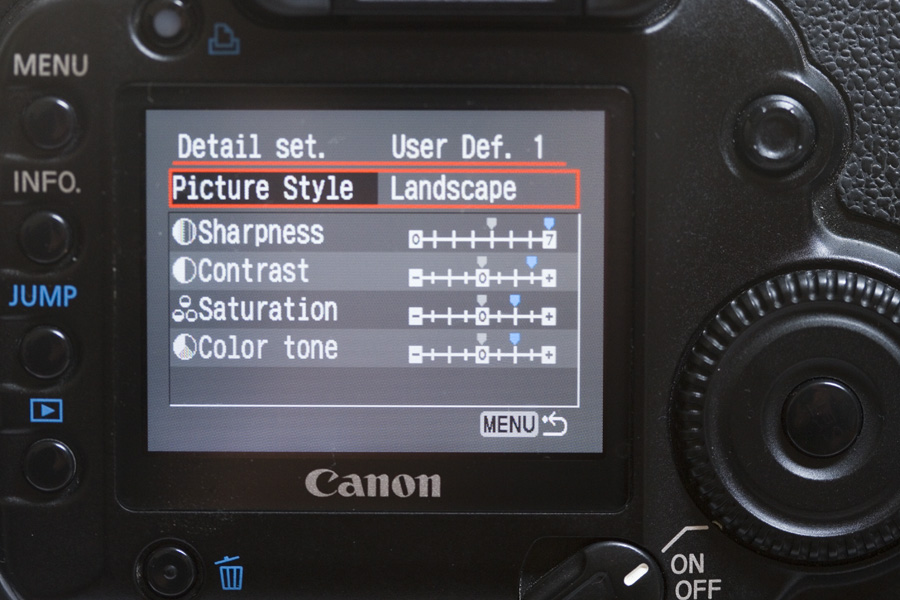
Now we have "cameras" that present us with pretty little screens containing all sorts of menus and sub-menus and very little to do on the main dial knobs. What we do have is a rather confusing array of double-function buttons and too many screens to check for settings. Like this here:

Now, before I hear any Nikon users giggling about their superior menus, that is not the case and you know it. I am privileged to play with both systems regularly and they are both easy but they can both be confusing.
Now we have clearly identified the problem but where do we start to fix it?
Quite simple really. We get back to basics. BIG TIME!
Much has been said about the "3 Kings of photography" or whatever you want to call them. They are Shutter Speed, Aperture and Sensitivity (or ISO if we must...)
Here follows some Geekspeak...scroll past if you like or read on if it works for you.

The 50mm is the focal length.
Therefore, f/stop or 50mm / 4 = 12.5 mm. Simple!
A 50mm lens set to f/4 will have an aperture opening of twelve and a half millimeter in diameter.
Set the same 50mm lens to f/22...or, more mathematically, 50/22 and you will find that the aperture opening is now 2.27 mm in diameter.
Open it up to f/1.4...you guessed it, 50/1.4 and you will find that the aperture opening now has a diameter of 35.714 mm.
This should explain why big f/ numbers make small apertures and small f/ numbers make big apertures inside the lens.
Lovely and fascinating to know but how does this have a bearing on controlled adjustments to exposure?
We have seen by now that ISO or Sensitivity and Shutter speed (without half-stops and one-third stops) were very predictable and linear. Every adjustment was half or double the value of it's neighbour...
Those who would like to do so can now go and revisit primary school maths, the little guy pi or π , (22/7) and the formula for calculating the area of a circle: π x r squared.
Those weird numbers 2, 4, 5.6, 8, 11, 16 and so on are mathematically correct to give aperture opening sizes exactly half or double the area of the neighbour.
So, from the other end, a circle with a diameter or radius of 16 mm will have an area of double that of a circle with a diameter or radius of 11 mm.
The dots should start to join up by now, yes?
That is the relation among our three kings of exposure! Every adjustment upwards or downwards results in a known quantity of light being controlled.
Now then, the mission is to go and find how to control those three guys on your camera. Keep playing until you can adjust any combination of them instinctively.
Coming up in the next part:

Av, Tv, "Manual", A, S and "Program" (Depends whether you shoot Nikon, Canon or another...) and the greatest villain of them all exposed...the Darth Vader of Photography and your biggest enemy to conquer...your camera's light meter!
It does not help much when the wife comes hopping and skipping along, sporting a better pic with the trusty old compact which was handed down to her as it was now completely redundant.
The D-SLR now rules supreme...who wants a compact? Those are for girls...or wives...who keep telling us that there was nothing wrong with the old humble compact because, after all looky here at the pic I got which is so much better with the pic YOU got and that was a lot of money to spend and look, you are not even getting the same results as you used to...
Sound familiar?
Let's kick some D-SLR butt and take things back.
For a start, that nice new toy is NOT a camera. It might be shaped like a camera but that is part of the deceit. This is a camera.

And yes, I used to do weddings with that very camera and a second one like it.
Now I am not about to start waffling, there is a point to this but in the days of this camera, the camera itself was important but it played a very small role in the actual photo that it produced. As long as it was not leaking light onto the film and wound the film on accurately that was it.
For different effects we would use Agfa or Fuji of whatever kind, Velvia, Provia, Ilford for black & white...FP-4 or HP-5.
And you had 36 frames before you had to rip out the canister and replace it with a fresh one.
Sadly this has changed a bit...and therein lies the rub!
Instead of using our favourite film we are confronted with this
On this trusty old K-1000 there was a very mechanical control knob with shutter speeds ranging from "B" to 1/1000 second with speeds like 1/4, 1/8, 1/15 1/30, 1/60 of a second and so on. Which used to be the maximum flash sync speed by the way! No half-stops or one-third stops there!
The lens aperture was controlled by a mechanical ring on the lens like the ones still seen on Nikon's "D" lenses. Again there were very little half-stops and definitely no one-third stops.
ISO was simple. Film was rated to 100, 200, 400 or 800 if you could afford and get it. And do remember that you had to use it up and replace with another one. No press of a button to flip from 200 to 1600. If you had just put in a 36 spool that was a bit of a problem to open in a darkroom, cut and...oh no.
OK, enough of that, fast forward to the present day.
Now we have "cameras" that present us with pretty little screens containing all sorts of menus and sub-menus and very little to do on the main dial knobs. What we do have is a rather confusing array of double-function buttons and too many screens to check for settings. Like this here:
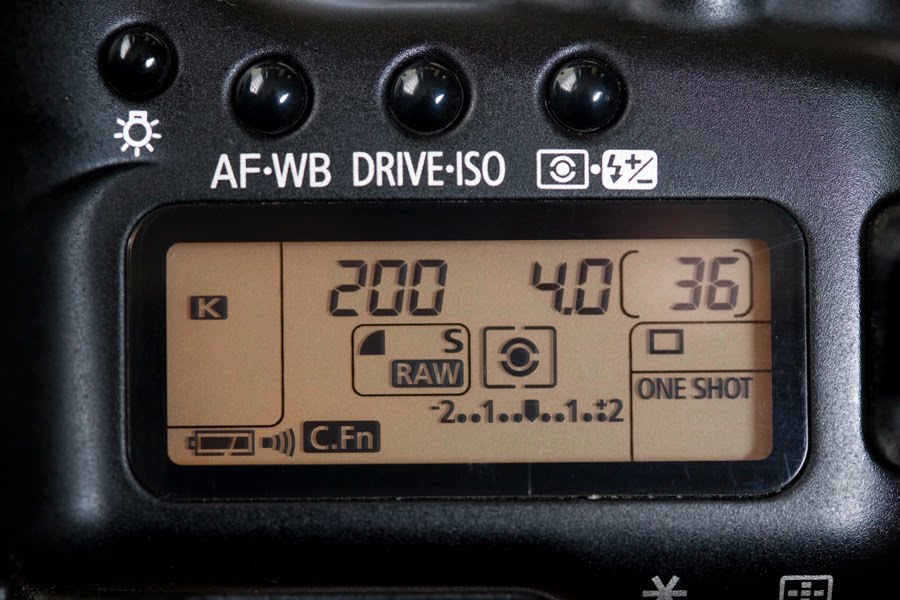
Now, before I hear any Nikon users giggling about their superior menus, that is not the case and you know it. I am privileged to play with both systems regularly and they are both easy but they can both be confusing.
Now we have clearly identified the problem but where do we start to fix it?
Quite simple really. We get back to basics. BIG TIME!
Much has been said about the "3 Kings of photography" or whatever you want to call them. They are Shutter Speed, Aperture and Sensitivity (or ISO if we must...)
Here follows some Geekspeak...scroll past if you like or read on if it works for you.
ISO is a French organisation and, as such their word order is regularly different from the civilised world...should I have said rest of the civilised world...
ISO is the "International Organisation for Standardization" when the French word order is taken into account and I will not even try to repeat the proper French styling.
Fact is, that is now the standard that used to be the well-known American "ASA" ( American Standards Association...a bit of a misnomer, yes, I know...). ASA in itself is a linear scale of sensitivity which ran parrallel to the German logarithmic DIN (Deutsche Internazionale Norme)
You would possibly be happy to know that the Russians had their own system called GOST which was fairly similar to ASA and there were several other lesser known systems...
Hurter & Driffield (H & D)
Weston
B.S. I (Index) - a long-outmoded logarithmic British Standard scale and more...
Thank goodness for ISO, my head hurts already.
So, ISO in this context then, is simply a system of measuring sensor or the film's sensitivity to light in a controlled standard.
Shutter speed is the duration of time over which a little set of curtains inside the camera exposes the film (or sensor nowadays) to the image projected by the lens.
Shutter speed used to be simple as seen on the old workhorse above but nowadays we have all sorts of intermediate numbers for greater precision and greater control over the resulting image.
Now for the big problem because this is where the wheels normally come off for most!
Aperture.
Call him Aperture, call him f/stop or whatever you please, this is the backward little black sheep cousin of the family who is bound to cause some frustration because he does not seem to make any sense at first.
The word f/stop originates from the forefathers of this village idiot, very likely due to the origins of the "stops" on the mechanical ring on the lens barrel.
This is what it used to look like...

Now, please note the little orange yellow diamond forward of or above the white numbers on the ring at the red arrow. From it's fixed position against the moveable white numbers indicated by the arrow you will notice that the aperture inside the lens is set to halfway beteween 5.6 and 4. Turning this ring either way it would click into "stops" directly corresponding with the numbers or at "half stops" perfectly halfway between them.
Because of these mechanical "stops" on the lens barrel aperture ring, any adjustment in exposure is nowadays loosely referred to as f stop adjustments. Also, please note the existence of a concept called EV or Exposure Value. You will come across the term on some sites.
EV 0 implies a one second exposure at f/1.0 .
EV 1 would be an exposure of half that value of light whether by reducing exposure time or decreasing aperture size.
EV 2 would be an exposure of half the value of light of EV 1.
Each Exposure Value, or EV, represents any of many different but equivalent combinations of f/stop and shutter speed. For instance, 1/250 at f/8 is EV14, and so is 1/125 at f/11. 1/125 at f/8, one stop more exposure, is EV13, and 1/250 at f/11, one stop less exposure, is EV15.
EV seems to be important when hand-held light meters are used and I have never had a use for those but now you have an idea what that is about.
OK, so now that we know where f/stops come from and why they are generally used to describe adjustments to exposure, let us start tying up the loose ends.
That is great to know but the numbers make no sense I hear you say...
They are "f/stops"...or Fstops or f-stops or however you want to write it but the pure form would be f/stop as it is really a little mathematical formula where f = the focal length / stop or, simply put,
f (focal length of the lens / the white number (4, 16, 1.4 or whatever)
What the ...insert expletive here if you so wish...
Simple really.
Let us deal with a 50mm lens. You can read more about the 50mm prime lens on my other equipment related blog here:
http://shootingwideopen.blogspot.com/2010/07/back-to-basics-old-school-style.htmlThe 50mm is the focal length.
Therefore, f/stop or 50mm / 4 = 12.5 mm. Simple!
A 50mm lens set to f/4 will have an aperture opening of twelve and a half millimeter in diameter.
Set the same 50mm lens to f/22...or, more mathematically, 50/22 and you will find that the aperture opening is now 2.27 mm in diameter.
Open it up to f/1.4...you guessed it, 50/1.4 and you will find that the aperture opening now has a diameter of 35.714 mm.
This should explain why big f/ numbers make small apertures and small f/ numbers make big apertures inside the lens.
Lovely and fascinating to know but how does this have a bearing on controlled adjustments to exposure?
We have seen by now that ISO or Sensitivity and Shutter speed (without half-stops and one-third stops) were very predictable and linear. Every adjustment was half or double the value of it's neighbour...
Those who would like to do so can now go and revisit primary school maths, the little guy pi or π , (22/7) and the formula for calculating the area of a circle: π x r squared.
Those weird numbers 2, 4, 5.6, 8, 11, 16 and so on are mathematically correct to give aperture opening sizes exactly half or double the area of the neighbour.
So, from the other end, a circle with a diameter or radius of 16 mm will have an area of double that of a circle with a diameter or radius of 11 mm.
The dots should start to join up by now, yes?
That is the relation among our three kings of exposure! Every adjustment upwards or downwards results in a known quantity of light being controlled.
Now then, the mission is to go and find how to control those three guys on your camera. Keep playing until you can adjust any combination of them instinctively.
Coming up in the next part:

Av, Tv, "Manual", A, S and "Program" (Depends whether you shoot Nikon, Canon or another...) and the greatest villain of them all exposed...the Darth Vader of Photography and your biggest enemy to conquer...your camera's light meter!
The Bottom Line on UV filters and Hoods
My apologies to all! Please forgive me as I am still getting to grips with this blogging software and the previous articles cut off rather abruptly.
The bottom line on UV filters I would recommend would be to look for the most expensive one you can find and then buy one even more expensive. Chances are they might not be readily stocked at your local camera store so let them order it for you.
Use it whenever ANYTHING threatens the safety of your lens' front element or, otherwise, keep it in your bag and available on demand.
As for hoods?
Make one, buy one but, whatever you do, use one...always!
Coming soon...loads of images with and without UV filters so you can judge for yourself how much image quality is degraded.
Handy tip: UV filters are rated by size in millimeters diameter or "front element". This front element thing is a bit of a misnomer. Example? The 50mm f/1.4 has a 58mm filter size but the true front element is little over half of that. If you are mechanically minded, measure the filter thread of the lens with a vernier calipers to get the true diameter...OR...look inside the lens cap. You will see the proper size there!
Until next time!
Wednesday, June 23, 2010
Which brings us to part 2... The matter of hoods.

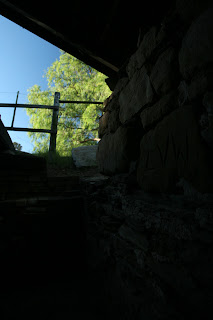
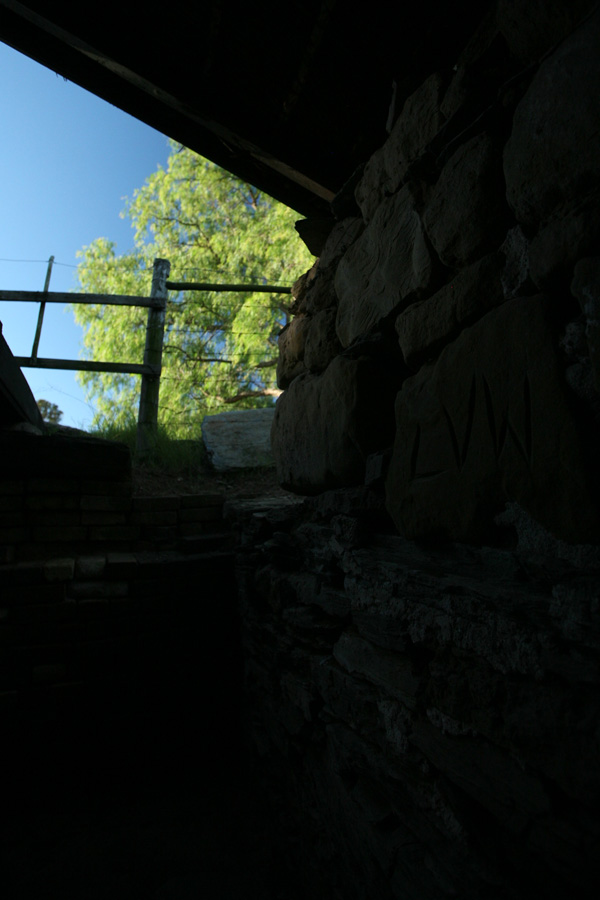
Now we all know that shooting into harsh light of justabout any type is hardly ever a good idea but, doing landscapes, you want to shoot across the light for that lovely shadow detail. Also, the best results with polarizers are to be had when shooting at square angles to the sun. The problems start when light hits the front element.
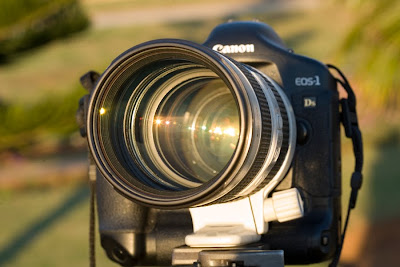
Now this is a really exaggerated example, sure, but seeing it displayed this way will hopefully let you think twice about light hitting the front of the lens.
The longer the lens barrel, the smaller the chances of rogue light wreaking havoc with your images but you can never be too careful, can you?
While the good people who design and build our little toys for us do everything in their powers to make the insides of the lens as dull and non-reflective as possible, there could be anything from 5 or 6 to 15 or more pieces of optical glass inside that lens barrel. Every single one of them will reflect some light, refract (or bend) some light and let some light pass through.
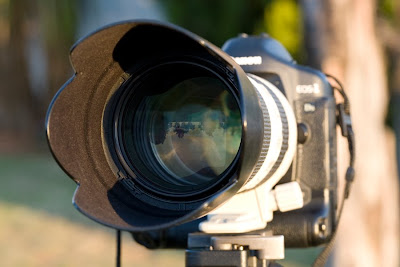
The problems occur mostly with the reflected light. That makes things appear that you did not count on...things that look like this...

This is why you need a hood (and lots of time and patience if you want to combine it with a polarizer).
Unless, of course you specifically want those for effect...
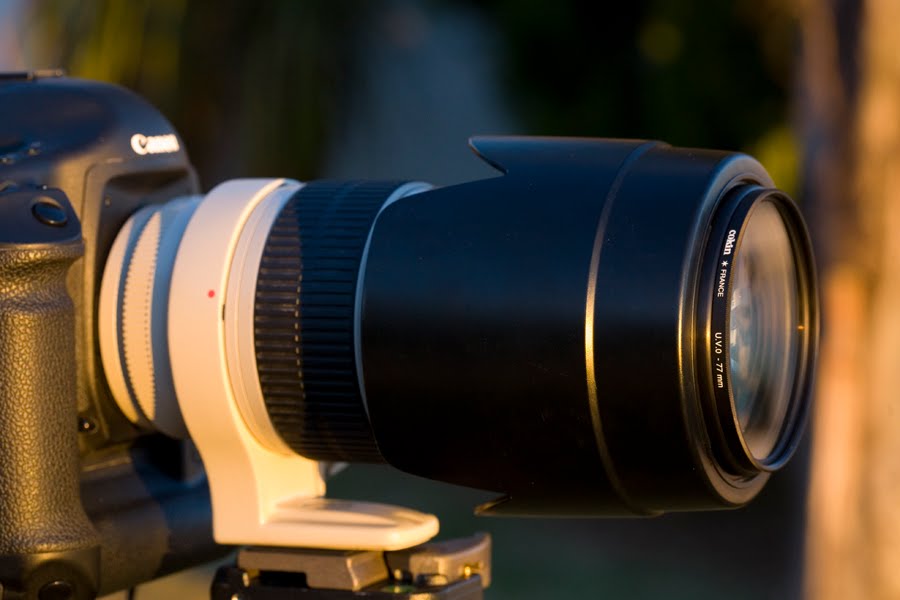
They come in all sorts of shapes and sizes for all lenses but essentially there are petal shaped hoods and cylindrical or conical hoods. You DIY guys out there will find several sites where you can get templates and make your own hoods. Go on then...Google it! Me, I'll buy them, thank you very much... but hey, hats off to the one who wants to do it.
Another alternative will be some of the Hong Kong based sellers on E-bay who do sell them at a fraction of the cost of the "real deal"...oh come on, it is a piece of plastic that should do two things...OK maybe three things...stay in place, stay out of your image and keep light off the front element.
Like so
How worthwhile could it be to pay five to ten times the price for the same plastic, only branded? As long as it works, right? You could also buy Nikon and mostly get the hood included standard with the lens unlike Canon where hoods are only included with the top L glass...Oops, that slipped out.
Oh, and one nice thing is that they can also mount in reverse so they take up no extra space in your kit bag.

Go on then, make one, buy one...but, whatever you do, use one!
Until next time!

Now we all know that shooting into harsh light of justabout any type is hardly ever a good idea but, doing landscapes, you want to shoot across the light for that lovely shadow detail. Also, the best results with polarizers are to be had when shooting at square angles to the sun. The problems start when light hits the front element.

Now this is a really exaggerated example, sure, but seeing it displayed this way will hopefully let you think twice about light hitting the front of the lens.
The longer the lens barrel, the smaller the chances of rogue light wreaking havoc with your images but you can never be too careful, can you?
While the good people who design and build our little toys for us do everything in their powers to make the insides of the lens as dull and non-reflective as possible, there could be anything from 5 or 6 to 15 or more pieces of optical glass inside that lens barrel. Every single one of them will reflect some light, refract (or bend) some light and let some light pass through.
The problems occur mostly with the reflected light. That makes things appear that you did not count on...things that look like this...

This is why you need a hood (and lots of time and patience if you want to combine it with a polarizer).
Unless, of course you specifically want those for effect...
They come in all sorts of shapes and sizes for all lenses but essentially there are petal shaped hoods and cylindrical or conical hoods. You DIY guys out there will find several sites where you can get templates and make your own hoods. Go on then...Google it! Me, I'll buy them, thank you very much... but hey, hats off to the one who wants to do it.
Another alternative will be some of the Hong Kong based sellers on E-bay who do sell them at a fraction of the cost of the "real deal"...oh come on, it is a piece of plastic that should do two things...OK maybe three things...stay in place, stay out of your image and keep light off the front element.
Like so

How worthwhile could it be to pay five to ten times the price for the same plastic, only branded? As long as it works, right? You could also buy Nikon and mostly get the hood included standard with the lens unlike Canon where hoods are only included with the top L glass...Oops, that slipped out.
Oh, and one nice thing is that they can also mount in reverse so they take up no extra space in your kit bag.
Go on then, make one, buy one...but, whatever you do, use one!
Until next time!
Tuesday, June 22, 2010
To UV or not to UV...
The next article will land before the weekend and will deal with UV filters and hoods. Due to time constraints I might very likely revert to one article per week but the good news is that I am also working on the first article on my other, more equipment orientated blog here:
http://shootingwideopen.blogspot.com/
I would prefer to put out one good read rather than two mediocre efforts per week.
Chat soon.
http://shootingwideopen.blogspot.com/
I would prefer to put out one good read rather than two mediocre efforts per week.
Chat soon.
Monday, June 21, 2010
To UV...or not to UV...and one or two related questions...
What does it do...what does it NOT do...and what should it do for you?
Let's start with what it is...
UV filters go by a few other names such as lens protection filters, haze filters skylight filters...although a skylight is technically rather an indoor lighting filter...and who knows how many others but they have been with us since the days of film and they will hopefully be around for a long time yet.
A UV filter is essentially a round piece of glass inside a metal bezel with screw thread so it can screw onto the front of the lens. It is optically neutral and should not contain any optical impurity or colour cast. In theory it should improve landscapes by cutting through the blue haze of bright harsh daylight and improve general harsh light conditions because of it's ultra-violet cutting capabilities...here follows some geekspeak...
That which we know as white light is electromagnetic energy which fits somewhere between radio waves and micro waves on the low frequency or long wavelength end and X-rays and Gamma rays on the high frequency or short wavelength end.
It is generally accepted to start at approximately 400 Nanometer at the low frequency side where Infrared becomes visible red light and end at the high frequency end at approximately 700 Nanometer where visible violet light transitions to invisible ultraviolet light.
Let's start with wat it does not do...
It does not cut out UV light completely!
Some top notch UV filters are said to make a bit of a difference from 350 Nanometer to 400 Nanometer but most cheaper ones don't make much of a difference above or below 400 Nanometer.
Anyone wanting to know more about this, place a comment, mail me or something or read the next paragraph for a clue in finding the long and technical answer. I love the technical stuff but I did promise to keep the geekspeak to a minimum, remember?
Now, if you Google it,you are bound to find dozens of sites and more opinions showing and endless variation of graphs and all sorts of "scientific evidence" on many brands of UV filters, some known some not. Not my kind of thing. Interesting when I am extremely bored and the lawn is done and there is no ironing to be done...
So what is the bottom line here then? Let's look at what a UV filter will do for you...It can and will protect the front element of your lens. Optical glass used in camera lenses and other high precision optical instruments is MUCH softer than normal window glass and it is also coated with various secret goodies which improve the passage of light through them.
The price you pay for this protection of your lens, apart from buying the UV filter to begin with, is a slight to very slight to possibly non-existent sacrifice of image quality.
So the bottom line is simple really, let your shooting environment dictate in using a UV filter as lens protection at a nominal or non-existent fee...except for buying it of course. That fee will be degradation of image quality.
The coatings on lenses and the optical glass used in lenses are quite fragile. Now before the $20-filter-on-a-$1000-lens gang comes a calling with violin cases, please hear me out.
If photographing off-road motorsport is your thing, fit one and have two in the bag for back-up. Stones fly about and having your $ 1000.00 lens' front element dinged is bound to spoil your day or maybe even your week. It will also most certainly lighten your wallet considerably regardless of whether the lens is repaired or replaced.
It happened to a mate right next to me...he wrote off a $100 polarizer but saved his $ 2000 lens when a little pebble flew off a rally car's wheel.
Similarly, if surfers or seascapes float your boat, fit a UV filter. All that sea air may not ruin your lens after the third shoot but will do it's bit to give you a hard time cleaning the front element. Heaven forbid some salt spray should splash onto it.
No doubt there are many other situations where a UV filter can save a lens...little ones and sticky fingers...so if you need it, fit it.
But for goodness sakes, PLEASE buy and fit a decent brand. A bum UV filter can make you think your lens is faulty. You might discover this only after your nice annual overseas holiday or safari or honeymoon. No problem...simply go again and redo all those pics. Yeah right...and we all go by the surname of Branson and all those lions will be waiting on the same spot.
This blog is not about flaming brands and so I shall refrain from pushing or flaming any brand of any type of equipment unless there is a really good reason to do so but what I can say is go for a high quality (read: EXPENSIVE) Hoya or similar well-known brand. Please don't buy the one that has been collecting dust in your local camera store for the last 10 years either. Get recent stuff that has been designed for recent lenses in the digital era.
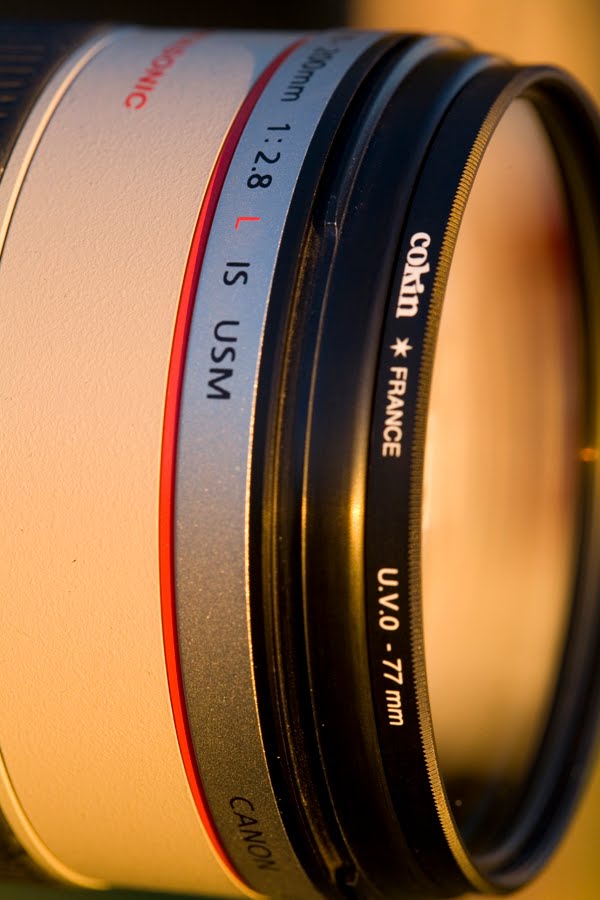
Personally, my 70-200 zoom is my mainstay lens and this has a Cokin slimline UV on it...which comes off as soon as shooting conditions allow it. My lenses used in studio-type environments do not have UV filters and will most likely never get any either.
Why is this you ask? Because a UV filter does degrade image quality. To such a small extent that it might not be worth mentioning but it does degrade image quality all the same.
How much? Well, have a look at the examples down below and you be the judge.
Think about it, shooting all your images through an extra piece of window glass which was never placed there by the designers of the lens...OK, I am sure the good folks at UV filter factory X might be offended but I have seen (and owned, yes...sigh...) some UV filters that could be jolly happy to be compared to window glass.
Fact remains, even if your UV filter is top brand X's best model, it may cause some unnecessary hassles when light bounces between the UV filter and the front element. There are more than enough places inside the lens and camera where light does bounce around and do other unwanted things, why then, would you want to add one more deliberately?
Which brings us to part 2... The matter of hoods.
Subscribe to:
Posts (Atom)